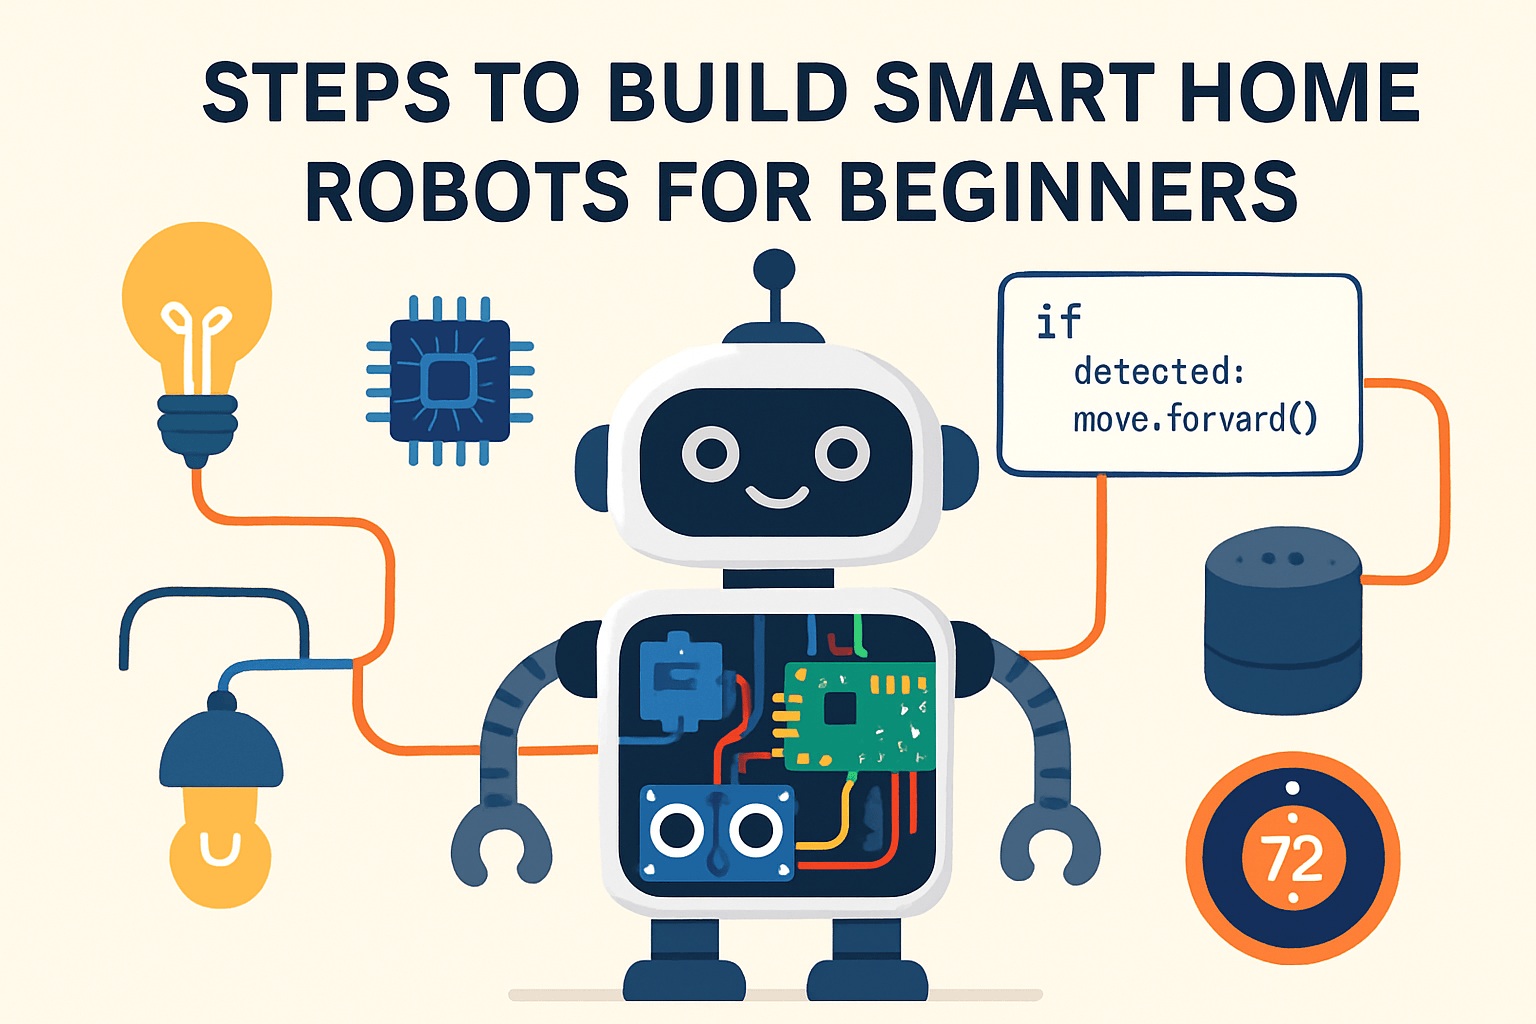
Simple Steps to Build and Code Smart Home Robots for Beginners

You can build your own smart home robot, even if you have never tried anything like this before. It feels amazing to see a robot you made turn on lights or sense movement in your room. With robotics hardware programming DIY kits smart home robotics, you get to learn by doing. Each step is hands-on and simple. Get ready to have fun and surprise yourself!
Key Takeaways
Pick a robot kit that is good for beginners. Make sure it matches your age, what you like, and your budget. This will help make building easy and fun.
Set up your workspace before you start. Follow each step in the instructions to build your robot safely and the right way.
Download the right programming software. Begin with easy coding projects using block coding or Python. This will help your robot work.
Test your robot many times. Fix problems one at a time. Ask for help from online groups if you need it.
Try new things by adding features. Learn more from online classes and robotics clubs. This will help your smart home robot get better.
Choosing a Kit

Getting Started
It is fun to pick your first robotics kit! There are many choices for you. You can find one that fits your age and what you like. You can also find one that fits your budget. Here are some popular beginner kits:
Robot Kit Name | Age Range | Price | Key Beginner Features and Benefits |
|---|---|---|---|
Code & Go Robot Mouse | 4-8 | $59.95 | Screen-free programming, teaches basic coding concepts, uses physical coding cards, develops sequential thinking. |
LEGO MINDSTORMS Robot Inventor | 10-16 | $349.99 | Drag-and-drop and Python coding, multiple robot models, Bluetooth control, great for beginners. |
Wonder Workshop Dash Robot | 6-12 | $149.95 | Voice commands, obstacle avoidance, screen-free programming, encourages creativity. |
Arduino Robotics Starter Kit | 12-16 | $89.99 | Professional-level programming, electronics basics, open-source support, bridges to advanced robotics. |
Makeblock mBot Neo | 8+ | $129.99 | Scratch and Python support, AI sensors, Wi-Fi, Bluetooth, robust hardware, online tutorials. |
Anki Vector Home Robot | 8-16 | $249.99 | AI-powered, voice recognition, teaches AI concepts and smart device integration. |

Tip: Pick a kit that matches your age and what you know. Younger kids may like screen-free robots. Older kids can try kits with more coding.
Kit Features
Look for kits that are easy and fun to use. Good beginner kits have these features:
Simple assembly: You can put the robot together without special tools.
Clear instructions: Step-by-step guides or videos help you build.
Beginner coding support: Many kits use block coding or drag-and-drop apps. Some let you try Python or C++ when you are ready.
Educational resources: Kits like LEGO Spike Prime and Makeblock mBot Neo have lessons and projects.
Sensors and smart home modules: Some kits have sensors, motors, Wi-Fi, or Bluetooth. These help you control lights or connect to smart devices.
Affordable price: Most beginner kits cost between $90 and $300. You can find one that fits your budget.
Product Name | Price | Key Features & Programming Support |
|---|---|---|
DaDa:bit AI Programmable Kit | $129.99 | Drag-and-drop programming, AI vision, sensors |
miniArm Open Source Robotic Arm | $89.99 | Arduino programming, sensor expansion |
Hiwonder miniAuto AI Robot Base | $89.99 | Arduino UNO R3, AI vision, autonomous driving |
MechDog Open-Source AI Robot Dog | $299.99 | Scratch, Arduino, Python, voice interaction |
Many teachers like LEGO Mindstorms, Arduino Starter Kit, and Makeblock mBot Neo for smart home projects. These kits help you learn more as you grow.
The right kit helps you start your smart home robotics journey. Pick a kit that makes you excited. Get ready to build something cool!
Robotics Hardware Programming DIY Kits
Unboxing
Unboxing your kit feels like opening a treasure chest. You get to see all the cool parts you will use to build your robot. Before you start, clear a table or desk so you have plenty of space. Good lighting helps you see small pieces.
Take everything out of the box and lay it out. Most robotics hardware programming DIY kits smart home robotics include:
Sensors (such as infrared sensors for detecting lines or movement)
Motors or servos for moving wheels or robotic arms
Structural parts (these might be LEGO-style pieces, metal frames, or plastic panels)
Wires and connectors
A USB cable for connecting to your computer
A quick start guide or instruction booklet
Sometimes, extra parts like wheels, screws, or even a screwdriver
Tip: Use small containers or trays to keep tiny screws and parts from rolling away. You can label each container to make finding parts easier.
Check the instruction booklet or parts list. Make sure you have every piece before you begin. If something is missing, contact the kit company right away.
Assembly
Now comes the fun part—putting your robot together! Start by setting up your workspace. Pick a flat, sturdy surface. Make sure you have enough room to spread out all the parts. Keep your tools close by. If you are working with younger kids, choose age-appropriate tools like blunt-tip scissors.
Here are some safety tips to keep in mind:
Wear protective eyewear if you are using tools.
Tie back long hair and avoid loose clothing.
Make sure your workspace has good lighting and ventilation.
Keep a first aid kit nearby, just in case.
Always have an adult supervise if you are a child or new to building robots.
Safety First: Never rush. Take your time and follow each step in the guide. If you get stuck, ask for help or look for online videos.
Let’s break down the assembly process:
Organize your parts. Group similar items together. This makes it easier to find what you need.
Follow the instructions step by step. Most robotics hardware programming DIY kits smart home robotics come with clear guides or even video tutorials. Read each step before you start.
Start with the frame. Build the body of your robot first. Attach wheels or legs as shown in the guide.
Add the motors and sensors. Plug the motors into the right spots. Attach sensors where the instructions show. Make sure wires are not tangled.
Connect the microcontroller. Place the board in its spot. Use the USB cable to connect it to your computer when you are ready to program.
Double-check your work. Make sure all screws are tight and wires are secure. Loose parts can cause problems later.
Most kits do not need soldering or special tools. You can usually snap or screw parts together by hand. If you need a screwdriver, the kit often includes one. You do not need to worry about using glue or working with dangerous materials.
Note: If you ever feel unsure, check the kit’s online community or help forum. Many people share tips and photos of their builds.
Once you finish assembly, you are ready to move on to programming. You have built the foundation for your smart home robot. Get ready to see it come to life!
Programming Setup

Software Installation
You have finished building your robot. Now, you get to bring it to life with code! Start by picking a programming platform that matches your comfort level. Many beginners love Scratch because you can drag and drop blocks to make your robot move or sense things. If you want to try something more advanced, Python is a great choice. Python is easy to read and has lots of helpful libraries. Some kits use Arduino IDE, which lets you write code in C or C++. This is perfect if you want to learn how robots talk to their hardware.
To install the software, visit the official website for your kit or programming platform. Download the installer for your computer. Follow the steps on the screen. Most kits give you a quick start guide or a video to help you. If you use robotics hardware programming DIY kits smart home robotics, you might find sample code or tutorials in the kit’s booklet or online. However, not all kits include pre-installed tutorials for smart home projects. For example, the OSOYOO Smart Home IoT Kit relates to smart home projects, but it is not clear if it comes with sample code. LEGO Spike Prime offers guided lessons, but these focus on general robotics.
Tip: Try out the sample projects first. They help you learn how the software works and give you ideas for your own robot.
Connecting Devices
After you install the software, connect your robot to your computer. Use the USB cable from your kit. Open the programming app. Select the right port or device from the menu. Some robots use Bluetooth or WiFi, so you may need to pair them with your computer or tablet.
Sometimes, devices do not connect right away. This can happen because of different communication protocols like Zigbee, Z-Wave, WiFi, or Bluetooth. Some brands only work with their own products. To avoid problems, check that your devices use the same system or come from the same brand. If you want to mix devices, use a central hub or controller. This helps different devices talk to each other. If your robot stops working, try resetting and pairing it again.
Stay patient and double-check your connections. Most problems have simple fixes!
Smart Home Robotics
Basic Coding
You have built your robot and set up the software. Now, you get to make your robot do smart things around your home! Let’s start with some basic coding ideas that work with most robotics hardware programming DIY kits smart home robotics.
Here are some important concepts you will use:
Sensors help your robot “see” or “feel” things, like light, sound, or movement.
Controllers and microcontrollers (like Arduino) act as the robot’s brain.
Motors and servos let your robot move or control objects.
WiFi or Bluetooth modules help your robot talk to other devices.
User interfaces (like buttons or apps) let you control your robot.
Most beginner kits use simple platforms like Scratch, Blockly, or Arduino C. You can use these to control lights, fans, alarms, and more. Here’s a table showing common smart home functions you can automate and the parts you need:
Common Smart Home Functions Automated | Supporting Kit Components and Features | Programming Platforms Supported |
|---|---|---|
Controlling fans | Motors, 130 DC Motor, Servo Motor | Scratch, Blockly, Arduino C |
Lighting systems | LEDs, Light sensors, 4 Digit LED Module | Scratch, Blockly, Arduino C |
Alarms | Buzzers, Sound sensors | Scratch, Blockly, Arduino C |
Environmental sensing (temperature, humidity) | Temperature and Humidity Sensor | Scratch, Blockly, Arduino C |
Interactive audio systems | Buzzers, Sound sensors, IR Receiver | Scratch, Blockly, Arduino C |

Let’s try a simple example. You want your robot to turn on a light when it gets dark. Here’s what you do:
Connect a light sensor and an LED to your microcontroller.
Open your programming platform (like Arduino IDE or Scratch).
Write a simple code. For Arduino, it might look like this:
int lightSensor = A0; // Light sensor pin
int ledPin = 13;      // LED pin

void setup() {
  pinMode(ledPin, OUTPUT);
  pinMode(lightSensor, INPUT);
}

void loop() {
  int sensorValue = analogRead(lightSensor);
  if (sensorValue < 300) { // It’s dark
    digitalWrite(ledPin, HIGH); // Turn on LED
  } else {
    digitalWrite(ledPin, LOW); // Turn off LED
  }
}
Save your code and upload it to your robot.
You can use similar steps to control fans, alarms, or even make a weather station. Many robotics hardware programming DIY kits smart home robotics come with sample projects and tutorials. Try those first to get comfortable.
Tip: Always start with small projects. Once you see your robot control a light or sound an alarm, you will feel more confident to try new things.
Testing and Troubleshooting
You have uploaded your code. Now, it’s time to test your robot! Watch what happens when you trigger a sensor or press a button. If something doesn’t work, don’t worry. Every builder faces small problems at first.
Here’s a simple way to troubleshoot:
Figure out what’s wrong. Does the robot not move? Does the light stay off? Write down any error messages or weird behavior.
Break the problem into parts. Is it the hardware, the software, or the connection?
Test each part by itself. For example, try running just the motor or just the sensor.
Use a multimeter to check wires and connections. Make sure everything is plugged in right.
If you use Arduino IDE, look for error messages. Fix any spelling mistakes or missing semicolons.
Check your USB cable and make sure you picked the right port and board in the software.
Use
Serial.print()in your code to see what your robot is thinking. This helps you find logic errors.If a sensor doesn’t work, check the wiring. Try using a simple test code to see if the sensor responds.
Work on one part at a time. Test each module before putting everything together.
If you get stuck, ask for help in online forums or the kit’s community.
Note: Most problems have simple fixes. Take a break if you feel frustrated, then come back and try again.
You can always expand your project once it works. Here are some fun ways to add new features:
Start with a simple project, like a light that turns on when you clap.
Once it works, add more sensors or try controlling more devices.
Try using voice commands or connect your robot to a smart speaker.
Use cloud services to control your robot from anywhere.
Add AI features, like face recognition or learning routines.
Make your robot help with real tasks, like reminding you to take medicine or checking the weather.
Many robotics hardware programming DIY kits smart home robotics let you add new modules or upgrade your code. You can keep learning and building as you go.
Pro Tip: Document your changes and test each new feature before moving on. This helps you spot problems early and makes your robot even smarter.
You can turn your home into a smart space, one step at a time. Keep experimenting, and soon you’ll have a robot that does more than you ever imagined!
You did it! Be proud of what you made. Every robotics expert started as a beginner. You can keep learning by joining groups like Home Assistant Discord or EZ-Robot forums. Try out new projects and watch videos on YouTube. You can also join a robotics club to get ideas. Stay excited by building things and sharing what you do. Here are some easy resources to help you learn more:
Resource Type | Examples & Tips |
|---|---|
Robotics Kits | |
Online Courses | Edx, Udemy, Coursera |
Books & Ebooks | Arduino Projects Workbook, Tiny Robot guides |
Smart Devices |
Keep trying new things and enjoy your smart home robot adventure! 🚀
FAQ
How long does it take to build my first smart home robot?
You can build your first robot in one afternoon. Most beginner kits take 1–3 hours to assemble. If you follow the guide step by step, you will finish faster.
Do I need to know how to code before I start?
No, you do not need any coding experience. Many kits use block coding or simple drag-and-drop apps. You will learn as you go. Start with sample projects to build your confidence.
What if my robot does not work after I finish building it?
Don’t worry! This happens to everyone. Check your wires and connections first. Try restarting your robot. If you still have trouble, look for help in the kit’s online community or support page.
Can I use my robot with Alexa or Google Home?
Some kits let you connect to Alexa or Google Home. Check your kit’s features. If your kit supports WiFi or Bluetooth, you can often add smart home voice control with extra modules.
What tools do I need to get started?
Most kits include everything you need. You might want a small screwdriver and some containers for tiny parts. You do not need soldering tools or special equipment for beginner kits.


